Cooking steak bites can feel like a guessing game—one moment they’re undercooked, and the next, they’re overdone. But don’t worry, I’ve got your back! As a home cook who’s had my fair share of triumphs and, well, “learning experiences,” I’ve gathered some tried-and-true tips to help you know exactly when your steak bites are cooked to perfection. From checking the color to using a meat thermometer, this guide will make your next steak night stress-free and delicious. Let’s dive in!
Table of contents
Visual Cues to Determine Steak Bite Doneness
I’ll be honest—when I first started cooking steak bites, I relied purely on instinct, which, let’s just say, wasn’t always reliable. I’ve had bites that were basically beef jerky and others that made me worry I was about to audition for a vampire movie. Over time, though, I learned some foolproof visual cues to help me get it right every single time. It’s all about what you see—color, texture, and even those tasty little juices.
The Role of Color Changes in Steak
One of the easiest ways to tell if your steak bites are cooked is by keeping an eye on their color. When the steak first hits the pan, it’s a vibrant red or deep pink (depending on the cut). As it cooks, it transitions to brown, starting at the edges and working its way toward the center. For medium-rare bites, you want the edges to look seared and caramelized while the center still holds onto a rosy pink. If the center turns completely brown, congratulations—you’ve hit well-done territory.
Here’s a tip: cut open a test piece if you’re unsure. Sure, it’s not as fancy as slicing into a perfectly cooked steak at the table, but it’s worth sacrificing one bite to avoid overcooking the rest. Plus, practice makes perfect—eventually, you won’t even need to cut them open because you’ll just know.
How to Assess Doneness by Surface Texture
This one took me a while to figure out because, let’s face it, steak texture isn’t something we naturally pay attention to. But here’s the thing—texture is a big deal! Raw steak bites are squishy and shiny, almost like they’re wet. As they cook, they lose that shine and develop a firmer surface. By the time they’re medium-rare, the surface should feel springy but not too soft.
Pro tip: Press gently on the steak with a fork or tongs while cooking. If it feels like pressing on the fleshy part of your palm below your thumb (when your hand is relaxed), you’re in medium-rare territory. If it feels firm, like the back of your hand, it’s well-done.
What the Juices Tell You
Okay, here’s where things get juicy—literally. The color of the juices that seep out of your steak bites can tell you a lot about their doneness. For rare steak, the juices will be bright red. Medium-rare juices are pink, and by the time you hit medium, they’ll run clear or slightly golden.
This is especially helpful if you’re cooking steak bites in batches. If you see clear juices pooling in the pan, it’s a sign the steak might be overcooked. A quick flip to check the texture can confirm. And don’t forget to let them rest for a couple of minutes after cooking! Those juices will redistribute, keeping the steak bites juicy and tender.
Using Touch to Test Steak Bites
When I first heard about the “finger test” for steak doneness, I thought, “Seriously? You’re telling me my hand knows more about steak than I do?” But after trying it out (and a few not-so-perfect steaks later), I’m a believer. Using touch to test steak doneness is surprisingly effective, even for steak bites, which cook faster than a whole steak. The trick is understanding the way the texture changes and comparing it to something we all have—our hands!
The “Finger Test” Method and How It Works
The finger test is as simple as it sounds: you press your steak gently with your finger (or tongs, if you’re not into touching hot food) to gauge its doneness. The texture of the steak changes as it cooks, and this method gives you a quick way to tell if it’s where you want it to be.
Here’s how it works:
- Relax your hand and touch the fleshy part of your palm, just below your thumb. That’s the texture of raw or very rare steak.
- Lightly press your thumb and index finger together. Feel that same fleshy part? That’s the texture of medium-rare steak.
- Press your thumb and middle finger together—now it feels firmer. That’s medium.
- Thumb to ring finger? Medium-well, and it’s pretty firm.
- Finally, thumb to pinky—that’s well-done steak. It’s firm and almost tough, which might be perfect for some folks but not ideal for most steak lovers.
It sounds a bit weird at first, but once you try it, you’ll see how handy (pun intended) it can be.
Comparing the Texture of Steak Bites to Hand Firmness
Steak bites work similarly to larger cuts of steak when it comes to texture, but they cook much faster. That means you need to be quick with your touch tests! Start testing after the first minute or two of cooking, especially if your bites are small.
The key is to press lightly on the steak bites while they’re still in the pan. For medium-rare, they should feel springy, like the base of your thumb when your thumb and index finger are pressed together. If they start to feel as firm as your pinky/thumb combo, you’ve crossed into well-done territory.
One thing I learned the hard way: don’t overthink it. The more you practice, the easier it gets to trust your instincts.
Why Smaller Bites Cook Faster and Feel Firmer
Here’s the thing about steak bites—they’re small, which means they cook way faster than you might expect. This is especially true if you’ve cut them into even-sized cubes (which you should). Because of their size, the heat penetrates more quickly, so the texture changes faster, too.
Smaller bites will naturally feel firmer compared to a whole steak when cooked to the same doneness level. For example, a medium-rare steak bite might feel closer to what a medium whole steak feels like, simply because the smaller size creates a firmer outer texture.
To avoid overcooking, I recommend pulling the bites off the heat just before they feel like the desired doneness. They’ll continue to cook slightly as they rest. This was a total game-changer for me—no more chewy, overdone steak bites!
Temperature Guidelines for Steak Bite Doneness
If there’s one tool I swear by for cooking steak bites, it’s an instant-read meat thermometer. I resisted for years, thinking I could just “eyeball” doneness (spoiler alert: I couldn’t). Once I finally gave in and started checking temperatures, my steak game improved practically overnight. Temperature is the most reliable way to make sure your steak bites are cooked exactly how you like them—no guessing required.
Recommended Internal Temperatures for Steak Doneness
Here’s a quick rundown of the ideal internal temperatures for steak doneness:
- Rare: 120°F to 125°F (cool red center)
- Medium-Rare: 130°F to 135°F (warm red center)
- Medium: 140°F to 145°F (warm pink center)
- Medium-Well: 150°F to 155°F (slightly pink center)
- Well-Done: 160°F+ (no pink, fully cooked through)
For steak bites, I usually aim for medium-rare or medium, since the smaller size means they can dry out quickly if cooked too long. Also, keep in mind that steak bites will continue to cook for a minute or two after you take them off the heat, so pull them off when they’re about 5°F below your target temperature.
How to Use an Instant-Read Meat Thermometer Effectively
Using a meat thermometer might seem straightforward, but there are a few tricks to getting an accurate reading, especially with smaller pieces like steak bites.
- Insert it into the thickest part of the bite: You want to get the temperature of the center, not the edges, which cook faster.
- Hold the thermometer steady: Wiggle it around, and you’ll get inconsistent readings. Push it in gently and hold it for a few seconds until the number stabilizes.
- Check multiple pieces: Since steak bites can cook unevenly depending on their size or position in the pan, test a few bites to make sure they’re all at a similar doneness.
Trust me, once you get the hang of it, the thermometer will feel like an extension of your hand. It takes the guesswork out of cooking and gives you that confidence boost when serving up your dish.
Avoiding Common Thermometer Mistakes
I’ll admit, I made plenty of thermometer blunders when I first started using one. Here are the big ones to avoid:
- Measuring too close to the pan: This was my rookie mistake. If the tip of the thermometer touches the hot pan, you’ll get an artificially high reading. Make sure to insert it into the meat at an angle, away from the surface.
- Not calibrating your thermometer: A miscalibrated thermometer can throw everything off. Most thermometers let you reset them—just stick it in a glass of ice water and adjust it to 32°F.
- Piercing the bite too many times: Every poke lets juices escape, which can dry out the meat. Try to limit checks to once or twice per piece.
Common Cooking Mistakes to Avoid
Let’s be real—no one is born a steak-bite master. I’ve made just about every mistake in the book when cooking these little meaty gems, from overcrowding the pan to outright torching them. The good news? Every misstep taught me something useful. If you’ve ever wondered why your steak bites don’t turn out quite right, chances are you’re making one of these common mistakes. But don’t worry, I’ve got you covered with some easy fixes.
Overcrowding the Pan
Overcrowding the pan is probably the most common mistake I see (and, honestly, the one I made for way too long). It’s tempting to toss all your steak bites in at once—after all, who wants to cook in batches? But when the pan gets too crowded, the temperature drops, and instead of a nice sear, you get a sad, grayish steam situation.
Here’s the fix: Give your steak bites room to breathe. Use a large skillet and cook in batches if needed. The goal is for each piece to have direct contact with the hot pan, allowing it to develop that delicious crust we all love. And trust me, the extra time is worth it—your steak bites will taste like they came straight out of a steakhouse.
Cooking Over Too High or Too Low Heat
Heat is everything when cooking steak bites. Too low, and you’ll end up with gray, lifeless pieces that look more boiled than seared. Too high, and you risk burning the outsides while leaving the insides raw (been there, done that).
The sweet spot is medium-high heat. Preheat your skillet for a few minutes before adding oil. You want the pan to be hot enough that the bites sizzle the moment they hit it, but not so hot that the oil starts smoking. A good indicator? Flick a drop of water into the pan—it should dance across the surface before evaporating. That’s your cue to start cooking.
The Importance of Resting Steak Bites
I used to think resting meat was just for big steaks or roasts—not tiny steak bites. Boy, was I wrong! Resting isn’t just for tradition; it’s science. When steak bites are fresh out of the pan, the juices inside are all riled up from the heat. If you cut or serve them immediately, those juices spill out, leaving you with dry bites.
Now, I always let my steak bites rest for about 3 to 5 minutes after cooking. Just transfer them to a plate and loosely cover them with foil. This lets the juices redistribute, making every bite juicy and flavorful. It’s a small step that makes a big difference.
Tips for Cooking Perfect Steak Bites Every Time
Cooking steak bites isn’t just about tossing cubes of beef into a pan and hoping for the best—although, hey, we’ve all been there. Over the years, I’ve learned that a little prep work and attention to detail can transform your steak bites from “meh” to mouthwatering. Here are my go-to tips for nailing it every single time, whether it’s for a quick dinner or impressing guests.
Prepping Your Steak Bites for Even Cooking
First things first: the prep. If you’re like me, you might have been guilty of cutting steak into uneven pieces in the past—big chunks here, tiny bits there. The problem? They’ll cook at completely different rates, leaving some pieces overcooked and others underdone. To fix this, I make sure all my bites are roughly the same size, about 1-inch cubes. It’s a small step, but it makes a world of difference.
Seasoning is the next big thing. Salt is non-negotiable—it not only enhances flavor but also helps tenderize the meat. I like to sprinkle it generously about 15-20 minutes before cooking to let it really sink in. As for additional seasonings, I keep it simple: a little pepper, garlic powder, and maybe smoked paprika for a subtle kick. Oh, and pat the steak bites dry before seasoning! Moisture is the enemy of a good sear.
Why Oil Choice and Pan Temperature Matter
Not all oils are created equal, especially when you’re cooking over high heat. I made the mistake of using olive oil once, only to have it start smoking halfway through cooking—oops. For steak bites, you need an oil with a high smoke point, like avocado oil, grapeseed oil, or good old vegetable oil. These oils can handle the heat without breaking down or burning.
Speaking of heat, your pan temperature is crucial. You want it hot—like, screaming hot. Preheat your skillet for a few minutes before adding the oil. A hot pan ensures a quick sear, locking in those juices and giving the steak bites that irresistible crust. Pro tip: Don’t crowd the pan. Work in batches if you need to, so every piece gets that golden-brown perfection.
Tricks for Locking in Flavor and Juiciness
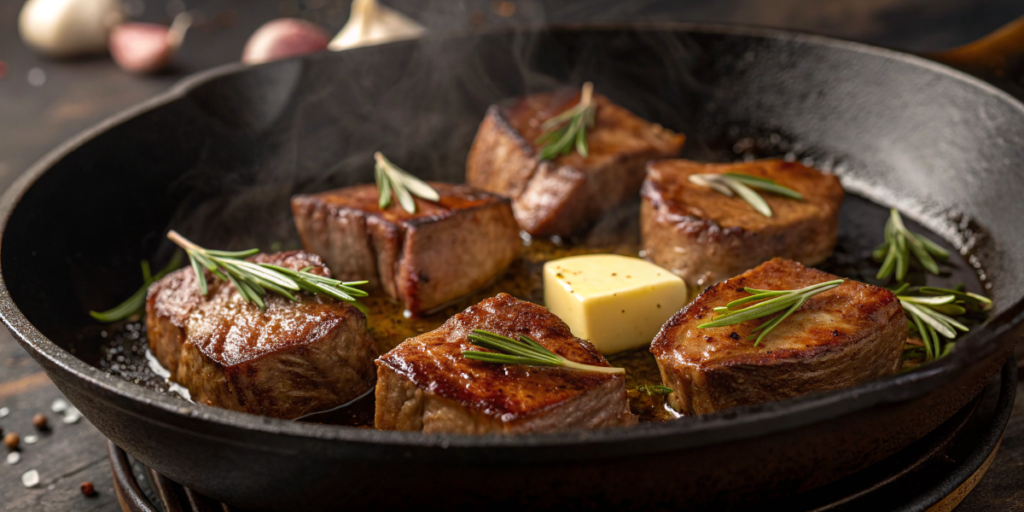
Here’s the fun part—infusing flavor and keeping those steak bites juicy. After searing the bites on all sides (about 1-2 minutes per side for medium-rare), I like to throw in a knob of butter, some smashed garlic cloves, and a sprig of fresh thyme or rosemary. Swirl the butter around the pan and spoon it over the steak bites for a quick baste. The butter caramelizes slightly, adding a rich, nutty flavor that’s absolutely divine.
Another trick? Let the steak bites rest after cooking. I know, I know—you’re hungry, and they smell amazing. But giving them just 3-5 minutes to rest allows the juices to redistribute, so they don’t all spill out the second you cut or bite into them. Trust me, it’s worth the wait.
Cooking steak bites to perfection doesn’t have to be intimidating! With a little practice, you’ll become a pro at identifying when they’re just right, whether by sight, touch, or temperature. Remember, it’s not about perfection—it’s about enjoying the process and the delicious results. So grab your skillet, a nice cut of steak, and let your culinary instincts shine. And hey, if you found these tips helpful, why not share them with your fellow steak lovers?


