There’s nothing quite like biting into a perfectly crispy piece of cheddar chicken. The crunch, the flavor, the juiciness—it’s a culinary dream! But here’s the burning question: how long should you bake it to get that coveted crispiness without drying out the chicken? Whether you’re a seasoned cook or trying this dish for the first time, I’ll guide you through the best baking practices to make your crispy cheddar chicken absolutely unforgettable. Let’s dive in and get that crunch just right!
Table of contents
The Ideal Baking Time for Crispy Cheddar Chicken
Ah, crispy cheddar chicken—just the thought of it makes my mouth water! But let’s be real: getting it perfectly crispy without overcooking or undercooking can feel like walking a tightrope. I’ve been there, staring at the oven timer and crossing my fingers, hoping for that magical crunch. After way too many experiments (and a few overly dry chicken mishaps), I’ve learned a thing or two about baking times and temperatures. Let me save you the trial and error.
Temperature Matters: Why 375°F to 400°F Works Best
Here’s the deal: your oven temperature is everything. I’ve tried baking cheddar chicken at 350°F before because, well, I thought slower and lower might keep it juicier. Big mistake. The chicken came out pale and soggy, and nobody wants soggy cheddar coating. On the other hand, cranking it up past 400°F? Sure, it got crispy, but the coating browned so fast that the inside didn’t have time to fully cook.
The sweet spot? Somewhere between 375°F and 400°F. This range allows the cheese and breadcrumbs to crisp up beautifully while giving the chicken enough time to cook through. I personally lean toward 400°F because I like my crust super golden, but if you’re worried about burning, start with 375°F. Oh, and don’t forget to preheat your oven—trust me, that’s not a step you can skip.
The Golden Time Range: 25-30 Minutes for Boneless Chicken
For boneless chicken, 25-30 minutes is the magic window. I usually set a timer for 25 minutes and then check. You’re looking for a deep golden crust and a satisfying sizzle. If the edges aren’t quite there, give it a couple more minutes. And don’t forget to flip on the oven light—I’m all for peeking to make sure things aren’t going south.
Now, if you’re anything like me, you’ve probably wondered, “Can I just rely on time alone?” Short answer: nope. Ovens can be unpredictable, and chicken thickness varies. Always keep an eye on it, but this time range has never let me down with boneless cuts.
Adjusting for Bone-In Cuts: How the Time Changes
Bone-in chicken is a whole different ballgame. It’s juicier, sure, but it takes longer to cook. For crispy cheddar chicken with the bone in, you’re looking at 40-45 minutes, sometimes even 50 if the pieces are extra large. The coating crisps up just as well, but patience is key here.
Pro tip: If you’re worried about the coating burning before the chicken is done, cover it loosely with foil for the first 20 minutes. Then, uncover it for the last stretch to let the crispiness shine. This method saved me more than once when I was working with stubborn drumsticks that refused to cook evenly.
Testing Doneness: Internal Temperature Should Hit 165°F
Let me tell you about the time I trusted my eyes instead of a thermometer. I pulled out the chicken because the coating looked perfect—golden, crunchy, all the good stuff. But one bite later, I realized the inside was still pink. Ugh, rookie mistake. That’s when I learned the golden rule of chicken baking: always, always check the internal temperature.
You’ll need a meat thermometer for this, and if you don’t have one, get one—it’s a game-changer. Stick it into the thickest part of the chicken (avoiding the bone if you’re using bone-in cuts), and make sure it reads 165°F. If you’re a little over, that’s fine too, but don’t let it go too far, or you’ll lose that juicy center.
Prepping Your Chicken for Ultimate Crispiness
Let’s talk prep—because crispy cheddar chicken isn’t just about baking it for the right amount of time. Oh no, the magic starts way before it even hits the oven. If you’re like me, you’ve probably rushed through the prep stage once or twice (okay, more than that) and wondered why your chicken wasn’t as crispy as you’d hoped. Well, I’ve learned the hard way that taking your time with the prep makes all the difference. Here’s how to do it right.
Marinating Basics: Why a Buttermilk Soak Makes a Difference
First up, let’s talk about marinating. I’ll admit, I used to skip this step because, well, who has the time? But one day, I tried soaking my chicken in buttermilk, and wow—it was a game-changer. Buttermilk does more than just tenderize the meat (though it does that beautifully). It also creates a slightly sticky surface that helps the cheddar coating cling better, so you don’t end up with half of it left on the baking sheet.
For best results, soak your chicken in buttermilk for at least 30 minutes. If you’ve got extra time, let it sit in the fridge for a few hours. And if you’re feeling fancy, throw in a pinch of garlic powder, paprika, or even hot sauce for added flavor. Trust me, it’s worth the wait.
The Cheddar Coating: Tips for Blending Cheese with Breadcrumbs
Now, the coating. Here’s where you can get creative, but the basic combo that never fails is shredded cheddar and breadcrumbs. I learned early on that mixing the two isn’t as straightforward as it sounds. If the cheese is too finely shredded, it melts too quickly and doesn’t crisp up. Too chunky, and it falls off during baking. A medium shred is your best friend here.
As for the breadcrumbs, panko is the way to go. It’s light, airy, and crisps up like a dream. I like to toss the breadcrumbs and cheddar with a little olive oil before coating the chicken—it helps everything stick and get that golden crunch. Bonus tip: Add some dried herbs, like parsley or thyme, to the mix for an extra flavor boost.
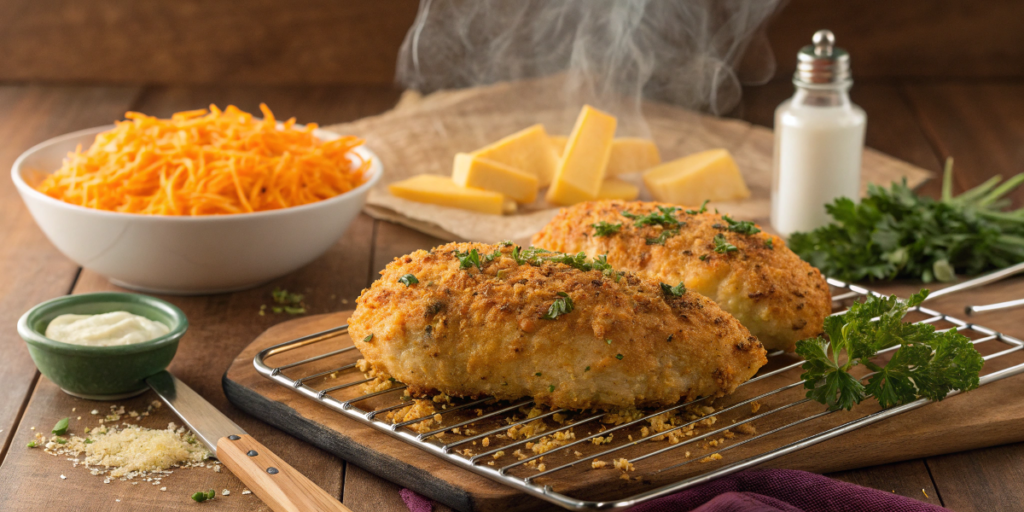
Oven Prep: Using a Wire Rack for Airflow and Even Crisping
Confession time: I used to bake my chicken directly on a baking sheet, and I couldn’t figure out why the bottom always ended up soggy. Then someone clued me in on the wire rack trick, and it changed everything. Placing your chicken on a wire rack set over a baking sheet lets the hot air circulate around the chicken, crisping it up evenly on all sides. No more sad, soggy bottoms!
If you don’t have a wire rack, you can use a crumpled piece of aluminum foil under the chicken to create a similar effect. It’s not perfect, but it works in a pinch.
Spritzing Trick: Using Oil Spray to Enhance Crunch Without Overdoing It
Here’s a sneaky little hack I picked up: oil spray. Once your chicken is coated and ready to go, give it a light spritz of cooking spray before putting it in the oven. It’s a small step, but it makes a huge difference in how crispy your coating gets. Plus, it’s way easier than brushing on oil, and you’re less likely to overdo it and end up with a greasy mess.
Pro tip: Use an avocado or olive oil spray for a clean flavor that complements the cheddar. And don’t go crazy with the spritzing—a quick, even layer is all you need.
Common Baking Mistakes to Avoid
When it comes to baking crispy cheddar chicken, the smallest misstep can take you from golden, crunchy perfection to a dry, disappointing mess. And let’s be real—no one wants that. Over the years, I’ve had my fair share of baking blunders, but each mistake taught me something valuable. Let me save you the trouble (and a few underwhelming dinners) with these common pitfalls and how to avoid them.
Overcooking Woes: Signs Your Chicken Is Too Dry
Overcooking is the number one culprit when your chicken comes out more like jerky than juicy. I’ve done it—left the chicken in “just a few more minutes” thinking I’d get extra crunch, only to end up with a crust so hard it could break teeth.
The trick is knowing when it’s done. Beyond the golden crust, the internal temperature should hit 165°F. If you don’t have a thermometer, cut into the thickest part and check for clear juices—no pink allowed. And remember, chicken continues to cook for a minute or two after you pull it out of the oven, so don’t leave it in until it’s bone dry.
Skipping the Rest Period: Why Letting It Cool Slightly Improves Texture
It’s tempting to dig in the second your crispy cheddar chicken comes out of the oven—I get it, I’ve burned my fingers plenty of times doing just that. But skipping the rest period is a mistake that can mess with the texture. Letting the chicken cool for 5-7 minutes gives the juices inside time to redistribute, keeping the meat moist and tender.
Resting also lets the coating firm up, so it doesn’t slide off when you cut into it. Think of it as giving your chicken a moment to gather itself—it’ll thank you with better texture and flavor.
Not Preheating the Oven: How It Affects Crispiness
Oh, the times I’ve thrown chicken into a cold oven because I was in a rush! Here’s the thing: not preheating your oven is a surefire way to sabotage your crispiness. A cold or unevenly heated oven means the cheddar coating won’t set right away, and instead of crisping up, it turns into a soggy mess.
Always preheat your oven to the proper temperature (usually 375°F to 400°F for crispy cheddar chicken). If you’re unsure whether it’s ready, invest in an oven thermometer. It’s a small gadget, but it saves you from playing the guessing game.
Layering the Coating Too Thick: The Risk of Uneven Cooking
It’s easy to go overboard with the coating—who doesn’t want extra cheese and breadcrumbs? But piling it on too thick can lead to uneven cooking. The outer layer crisps up while the inside stays undercooked or, worse, mushy.
The key is balance. Dip the chicken in your coating mixture and give it a gentle shake to remove the excess. You want enough to create a crunchy layer but not so much that it resembles a cheddar-coated snowball. Trust me, less is more when it comes to even baking.
Bonus Tips for Perfect Crispy Cheddar Chicken Every Time
Once you’ve mastered the basics of crispy cheddar chicken, it’s time to level up. Over the years, I’ve experimented with different techniques, flavors, and even reheating methods to make sure every bite is as good as it can get. Here are some bonus tips to ensure your cheddar chicken is always crispy, flavorful, and downright irresistible.
Alternative Coatings: Panko Breadcrumbs vs. Traditional Options
Let’s talk coatings. While traditional breadcrumbs work fine, panko breadcrumbs are in a league of their own. They’re lighter, crispier, and give your chicken that airy crunch that’s hard to beat. If you haven’t tried panko yet, you’re missing out—it’s like the crispy coating dreams are made of.
That said, don’t feel limited. Crushed cornflakes, pretzel crumbs, or even ground-up Ritz crackers can add a fun twist to your chicken’s texture and flavor. I once used crushed tortilla chips when I was out of breadcrumbs, and it turned out amazing! Don’t be afraid to get creative—sometimes the best discoveries come from using what you already have in the pantry.
Adding Flavor Twists: Herbs and Spices to Mix with Your Cheddar
Cheddar is the star of the show, but a few well-chosen herbs and spices can take things to the next level. My go-to blend? A little garlic powder, smoked paprika, and dried parsley mixed into the coating. It gives the chicken a subtle kick without overpowering the cheesy goodness.
If you’re feeling adventurous, try adding a pinch of cayenne for heat or some Italian seasoning for a Mediterranean vibe. And don’t forget to season the chicken itself before coating it—salt and pepper go a long way in ensuring every bite is flavorful, inside and out.
Using Convection Ovens: Why It’s a Game-Changer
If you’ve got a convection oven, consider yourself lucky because it’s a total game-changer for crispy cheddar chicken. The fan circulates hot air, ensuring even cooking and that coveted all-over crunch. I switched to convection baking a while back, and honestly, I’ll never go back to a regular oven for this recipe.
Here’s the trick: set your convection oven 25°F lower than the recipe calls for (so 350°F instead of 375°F) to prevent over-browning. And don’t overcrowd the baking sheet—leave some space between the chicken pieces so the air can circulate properly. The result? Crispy, golden perfection every time.
Reheating Tips: Keeping Leftovers Crispy the Next Day
We all know reheating fried or baked chicken can be tricky—no one wants a soggy mess. The best method I’ve found for reheating crispy cheddar chicken is using the oven or an air fryer. Preheat your oven to 350°F, place the chicken on a wire rack (or directly on the oven rack if you’re in a hurry), and heat for about 10-15 minutes. The coating stays crispy, and the chicken stays juicy.
If you have an air fryer, it’s even better! Just set it to 375°F and reheat for 5-7 minutes. Avoid microwaving unless you’re desperate—trust me, it turns that beautiful crispy crust into a sad, chewy layer.
There you have it! To achieve that perfect crispy cheddar chicken, aim for 25-30 minutes at 375°F to 400°F, ensuring the internal temperature hits 165°F. Prep and bake like a pro by following the tips above, and you’ll have a dish that’s crunchy on the outside and juicy on the inside every time. Ready to impress your family or guests? Try these methods today, and let the crunch speak for itself!


