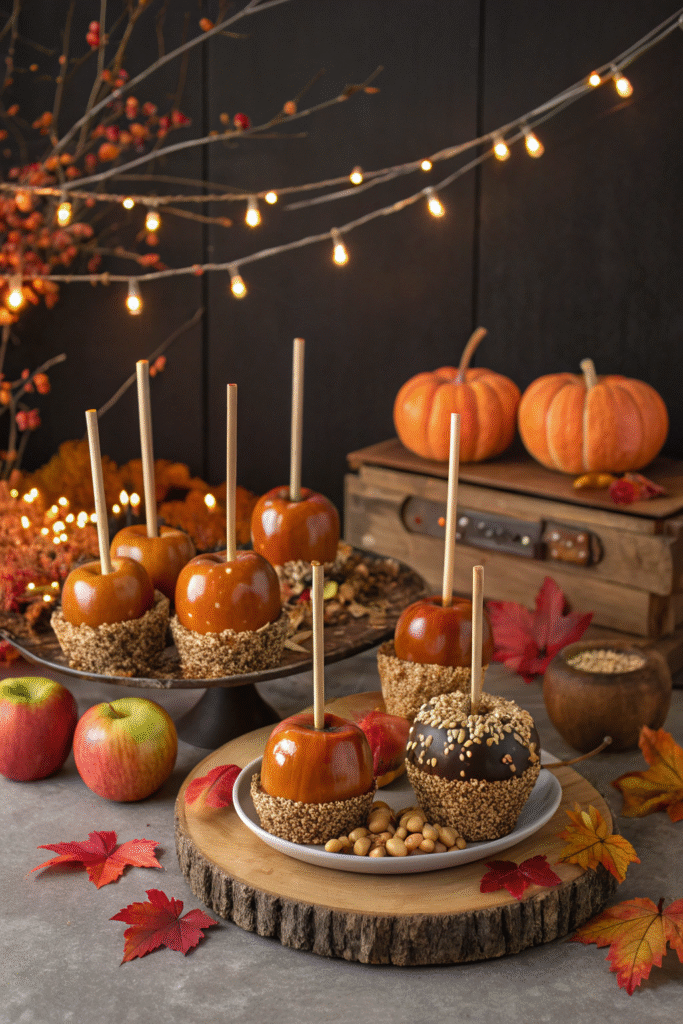
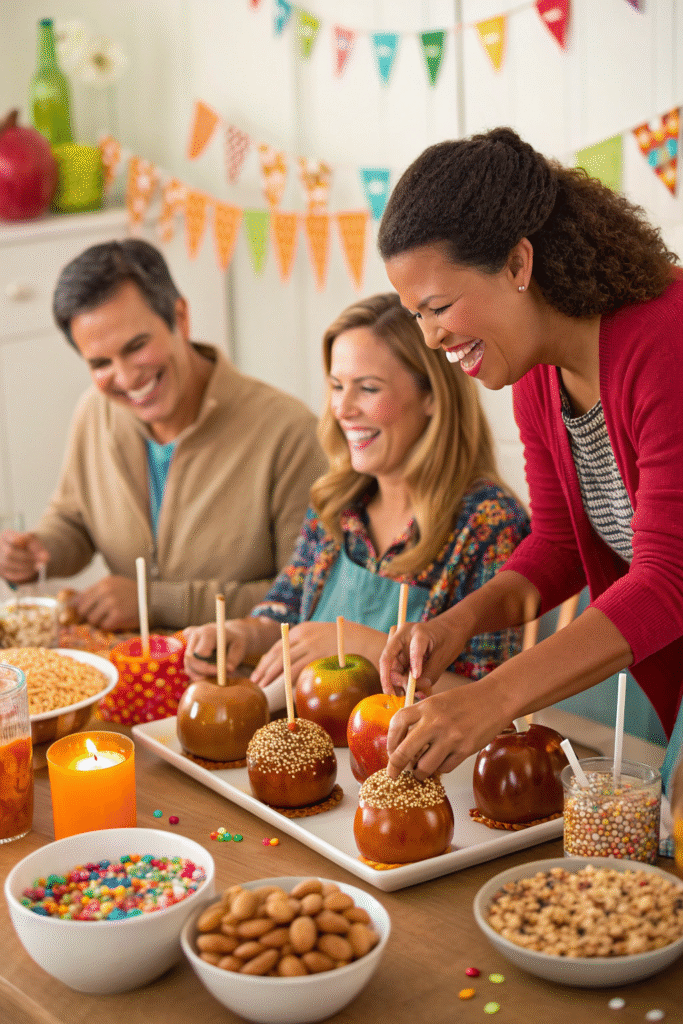
Ever been to a party where everyone crowds around one table, laughing, decorating, and sneaking little bites? That’s the magic of a caramel apple bar! In fact, interactive dessert stations have surged in popularity—Pinterest searches for “DIY dessert bar” jumped over 120% in the past year. Whether it’s a cozy fall gathering, a kids’ birthday bash, or a wedding dessert table, a caramel apple bar is a crowd-pleaser that’s as much fun to make as it is to eat. Let’s dive into all the sweet details you need to make yours unforgettable.
Choosing the Best Apples for Your Caramel Apple Bar
I’ll be honest — the first time I tried to set up a caramel apple bar, I completely messed up the apple choice. I grabbed the cheapest red apples at the grocery store, thinking, “Eh, an apple’s an apple.” Big mistake. They were mealy, too sweet, and the caramel just slid right off. My guests smiled politely, but I could see them struggling to bite into those sad things. Lesson learned: your caramel apple bar is only as good as the apples you start with.
Tart vs. Sweet Apples
Here’s the deal — caramel is rich, buttery, and very sweet. Pairing it with an equally sweet apple can make the whole thing feel a little… cloying. That’s why tart apples, like Granny Smith, are my go-to. The tang cuts through the sugar so each bite feels balanced instead of a sugar bomb. If you prefer something milder, Honeycrisp is a nice middle ground — crisp and juicy with a hint of sweetness.
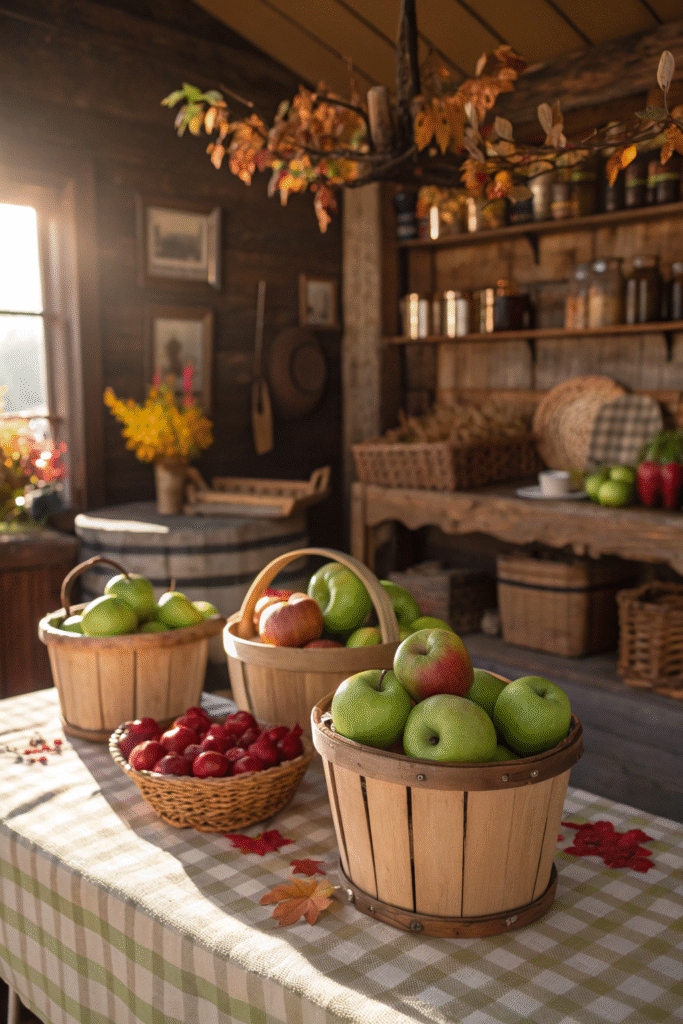
Why Granny Smith Wins Every Time
Granny Smith apples have this magical quality: they’re firm enough to stand up to hot caramel, their skin holds well against toppings, and they’ve got that tangy kick that keeps your taste buds from getting tired halfway through the apple. Plus, that vibrant green skin looks gorgeous on a dessert table.
Local Orchard vs. Store-Bought
If you can, hit up a local orchard. Fresh-picked apples not only taste better, but they’re usually coated in less wax than store-bought ones — which means caramel sticks better. I once drove 45 minutes out to a farm just for apples, and let me tell you, it was worth it. The flavor difference was night and day. If you do go the grocery store route, give the apples a quick scrub with warm water and baking soda to get that waxy coating off.
Size Matters
Bigger isn’t always better here. Huge apples look impressive but can be tough to dip and awkward to eat. I like medium-sized apples that fit comfortably in one hand. Easier for guests, especially kids, to manage without caramel dripping down their elbows.
Pro Tip: Pre-skewer your apples before guests arrive. Trust me, no one wants to wrestle a stick into a cold apple while everyone else is already loading theirs with caramel and crushed peanuts.
So, in short? Go tart over sweet, fresh over waxy, and medium over massive. Your guests will notice the difference — and you won’t have to watch anyone politely chew their way through an apple they secretly hate.
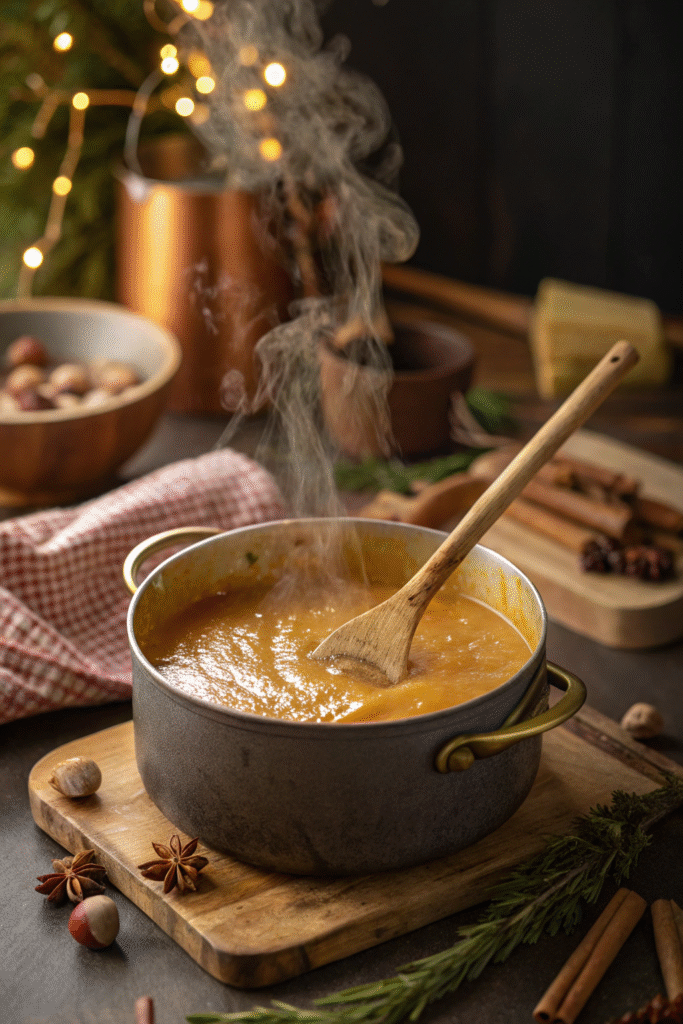
Making the Perfect Caramel for Dipping
The first time I made caramel for a party, I burned it so badly the whole house smelled like a campfire… but not the good, marshmallow-roasting kind. My guests were politely sipping cider while I was fanning smoke out the kitchen window. Since then, I’ve learned that making perfect caramel isn’t about being fancy — it’s about patience, the right tools, and knowing when to leave it alone.
Homemade vs. Store-Bought
Let’s settle this first: yes, you can melt store-bought caramel squares with a splash of cream and call it a day. I’ve done it in a pinch, and no one complained. But if you’ve got the time, homemade caramel will make people stop mid-bite and say, “Oh my gosh, what is this?” It’s silkier, richer, and you can control the flavor. My go-to ratio is one cup of sugar, half a cup of butter, and one cup of heavy cream — melt the sugar first, then whisk in butter, finish with cream. And for heaven’s sake, use a heavy-bottomed pot. Thin pans scorch faster than you can say “oops.”
The Key to Smooth, Glossy Caramel
Here’s where my impatient younger self always messed up: stirring too much. Once the sugar starts melting, resist the urge to poke at it constantly. Let it do its thing, swirling the pot occasionally to prevent hot spots. And when you add the cream, stand back — it bubbles like crazy.
I’ve also learned that keeping caramel smooth for a whole party means keeping it warm. I set mine in a small slow cooker on the “warm” setting. No re-melting disasters, no clumpy caramel that pulls the toppings right off your apple.
Flavor Variations That Turn Heads
Plain caramel is amazing, but adding a little twist can make your apple bar unforgettable. My three favorites:
- Sea Salt Caramel – Sprinkle flaky sea salt right into the pot before serving. The sweet-salty combo is unbeatable.
- Bourbon Caramel – A tablespoon of bourbon adds depth without overpowering. Adults love it.
- Cinnamon-Infused Caramel – Simmer a cinnamon stick in the cream before mixing it in. Perfect for fall vibes.
Pro Tip: Make more than you think you’ll need. I once underestimated my crowd and ended up melting chocolate chips as a backup dip — which was fine, but not the star everyone came for.
Perfect caramel is the heart of your caramel apple bar. Get it right, and even the “I’m not really into sweets” guests will be standing there, sticky fingers and all, going back for seconds.
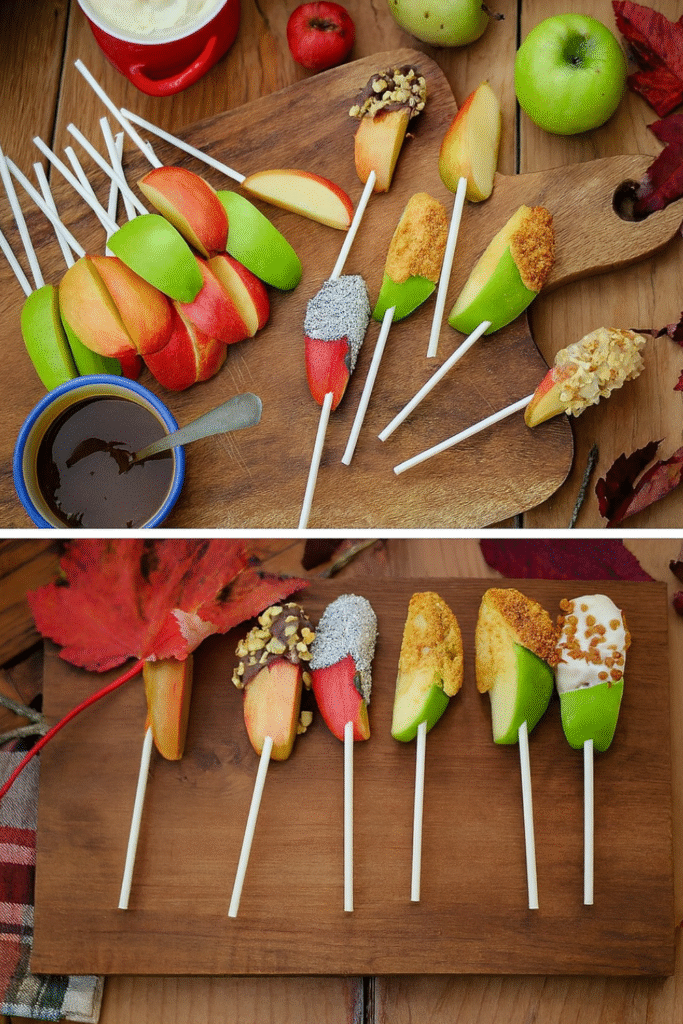
Creative Topping Ideas to Wow Your Guests
If caramel is the heart of the apple bar, toppings are the personality. They’re what make guests lean over the table saying, “Ooh, what’s that?” and suddenly pile their plates with combinations they didn’t even know they needed. I’ve learned over the years that variety is key — too few options and it feels flat, too many and you overwhelm people. The sweet spot (pun intended) is a mix of familiar favorites and a few “never tried that before” surprises.
The Classics That Never Fail
Let’s start with the staples. Crushed peanuts are a must — they’re the salty crunch that balances all that caramel. Rainbow sprinkles? Yes, they’re simple, but they bring instant joy (and kids make a beeline for them). Mini chocolate chips are another crowd-pleaser; they melt just slightly against the warm caramel, creating little bursts of chocolate in every bite. I always keep these three stocked because I know they’ll get used up first.
Gourmet Toppings That Feel Fancy
This is where I like to have fun. Toasted coconut gives a warm, nutty flavor without actual nuts — great for guests with allergies. Crushed pretzels add salt and crunch, and they look rustic-chic in a little mason jar. My personal showstopper? Freeze-dried raspberries. They’re tangy, colorful, and make people feel like they’ve stumbled onto some high-end dessert station at a boutique café.
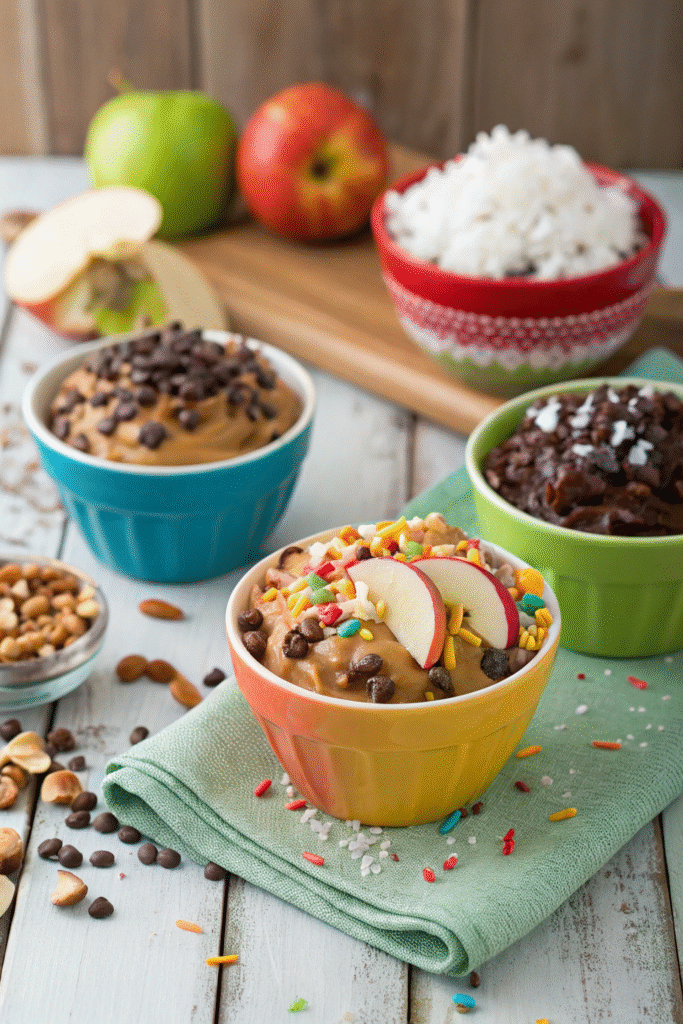
Seasonal Flavors That Steal the Show
When it’s fall, I can’t resist going all in on the cozy vibes. Pumpkin spice sugar (basically cinnamon sugar with a pinch of nutmeg, ginger, and cloves) transforms a caramel apple into something that tastes like autumn in a bite. Candied ginger is for the adventurous — spicy-sweet and addictive. Cinnamon crumble (think pie topping without the pie) makes the whole thing taste like a caramel apple crisp on a stick.
Presentation Is Half the Fun
Here’s something I learned the hard way: dumping toppings in mismatched plastic bowls might be practical, but it’s not inspiring. I use small glass bowls, little ceramic ramekins, or mason jars. Label them with cute tags so guests don’t mistake candied ginger for dried mango (yep, that happened once). Keep spoons in each container to avoid sticky hands in the topping bowls.
Pro Tip: Arrange toppings in a rainbow order — not only does it look beautiful for photos, but it subtly encourages people to try more than one. And trust me, once someone discovers caramel + pretzel + raspberry, they’ll be back for round two.
Toppings are where creativity comes alive. Give guests the right mix, and they’ll turn your caramel apple bar into an edible art gallery.
Setting Up a Pinterest-Worthy Caramel Apple Bar Display
I still remember the first caramel apple bar I set up that actually looked as good as it tasted. Before that, my displays were… let’s call them “functional.” Caramel in a saucepan, toppings in whatever bowls I could grab, and a paper tablecloth that looked like it survived a food fight. Then one fall, I decided I was going all in — pumpkins, fairy lights, rustic wood boards — and it changed everything. Guests didn’t just eat; they took photos, tagged me on Instagram, and asked if I’d help set up theirs next year.
Choosing the Right Table or Station
It starts with the foundation. A sturdy table at a comfortable height is a must. I love using a long farmhouse-style table or even a kitchen island if I’m indoors. Outdoors? I’ll throw a vintage quilt or burlap runner across a folding table to add texture. Just make sure you have enough space for people to move down the line without crowding.
Layering in Seasonal Décor
This is where the Pinterest-worthy magic happens. I scatter mini pumpkins and gourds down the center, tuck in a few sprigs of fall leaves, and weave fairy lights through it all. If I’m feeling extra, I’ll add a chalkboard sign that says something like “Dip it. Top it. Love it.” Simple touches like that make it feel like more than just a snack table — it becomes part of the event’s atmosphere.
Keeping It Functional
Here’s the thing: pretty is great, but your guests will get frustrated if it’s not practical. I pre-skewer all the apples and stand them upright in a big galvanized bucket. Each topping has its own spoon. I put napkins, wet wipes, and wax paper sheets at the end of the table so people can wrap their creations without dripping caramel all over my floor (learned that lesson the messy way).
Labeling for a Polished Look
Little handwritten tags on mini clothespins or tiny chalkboard stands add charm while helping guests identify toppings. Trust me, labeling prevents those “What is this?” moments that slow the line. It’s also a sneaky way to make people think you spent way more time on the setup than you actually did.
Pro Tip: Group items by category — apples at the start, caramel in the middle, toppings spread out after that. It keeps the flow smooth and avoids bottlenecks.
When you set up your caramel apple bar like it’s straight out of a fall magazine spread, it does more than feed your guests. It creates a memory — and maybe a few Pinterest boards.
Hosting Tips for a Smooth Caramel Apple Bar Experience
I wish I could tell you my caramel apple bar parties have always been seamless. Truth is, my first couple were chaos — sticky counters, impatient kids, caramel hardening into a brick halfway through, and me running around like I was on a cooking competition show. Over time, I picked up a few tricks that turned the whole thing from frantic to fun.
Pre-Wash and Dry Apples
It sounds obvious, but I’ve seen guests try to dip unwashed apples (once, at a friend’s party) and the caramel just slid right off. Apples have a natural wax coating — plus store-bought ones often have an extra layer — that keeps caramel from sticking. I give them a warm water and baking soda bath, dry them completely, and then let them sit out to reach room temp. That’s the key: caramel clings way better to a dry, slightly warm apple than a cold, wet one.
Keep the Caramel Warm and Happy
One of my early mistakes was leaving the caramel in a saucepan off to the side. After twenty minutes, it had cooled enough to rip toppings right off the apple like a sticker. Now, I either keep it in a small slow cooker on the “warm” setting or a fondue pot. Guests can dip without wrestling with half-set caramel.
Managing the Flow
Nothing’s worse than a bottleneck where everyone’s hovering in front of the caramel pot. I set up the table so there’s a clear start and end point: apples → caramel → toppings → wrapping station. That way, guests move like they’re going through a buffet instead of standing in one sticky huddle.
Tips for Kids vs. Adults
When kids are involved, I keep the toppings lower, use smaller apples, and offer extra napkins (and maybe a drop cloth under the table). Adults? I’ll pull out the “grown-up” toppings like bourbon caramel or espresso sugar. I’ve even done a “build your own” caramel apple competition where people vote for the most creative combo.
Encouraging Creativity
Some folks will just grab peanuts and be done. Others? They’ll layer pretzels, coconut, and freeze-dried raspberries like they’re competing on a cooking show. I like to put out little inspiration cards with topping ideas — it gives shy guests a nudge to try something different.
Pro Tip: Always have a few extra pre-dipped apples ready for people who don’t want to do it themselves. It keeps the pace moving and ensures no one leaves empty-handed.
A smooth caramel apple bar isn’t about perfection — it’s about removing the little roadblocks so everyone can focus on the fun. And trust me, fewer sticky spills means a much happier host.
When I think back on the best parties I’ve hosted, the caramel apple bar nights always stand out. It’s not just the sweet, gooey caramel or the crunch of a perfectly chosen apple — it’s the laughter when someone accidentally goes overboard with toppings, the “try mine!” moments between friends, and the proud smiles as guests hold up their creations for photos.
We’ve covered it all: picking the apples that actually work for dipping, making caramel that stays silky from the first guest to the last, laying out toppings that make people light up, creating a display so pretty it practically demands to be photographed, and running the whole thing without turning into a sticky mess yourself.
At the end of the day, a caramel apple bar isn’t about impressing people with gourmet skill — it’s about creating a space where they can play, taste, and enjoy something simple yet special. When guests leave with caramel on their fingers and a story about “the apple I made,” you’ve done it right.
So here’s my challenge: put together your own caramel apple bar this season. Try one or two of the tips you learned here, make it your own, and most importantly — take pictures. Share them on Pinterest so other hosts can steal a little inspiration (and maybe a topping idea or two).
Because the only thing sweeter than a caramel apple… is watching someone’s face light up when they take that first bite.
Print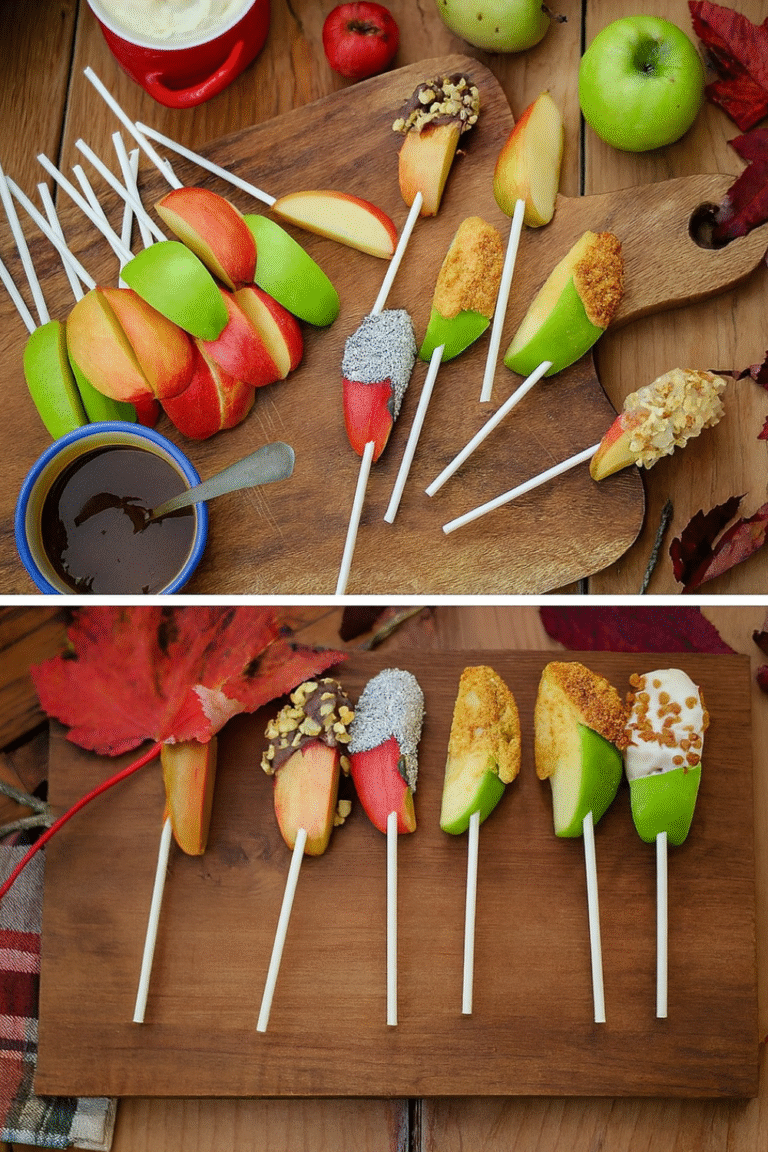
How to Create the Perfect Caramel Apple Bar
A fun, interactive dessert station perfect for parties, featuring crisp apples, warm silky caramel, and an array of creative toppings.
- Total Time: 35 minutes
- Yield: 12 servings 1x
Ingredients
- Medium-sized Granny Smith apples
- Wooden skewers
- 1 cup sugar
- 1/2 cup butter
- 1 cup heavy cream
- Sea salt (optional)
- 1 tbsp bourbon (optional)
- 1 cinnamon stick (optional)
- Crushed peanuts
- Rainbow sprinkles
- Mini chocolate chips
- Toasted coconut
- Crushed pretzels
- Freeze-dried raspberries
- Pumpkin spice sugar
- Candied ginger
- Cinnamon crumble
Instructions
- Wash apples in warm water with baking soda, dry thoroughly, and bring to room temperature.
- Pre-skewer each apple with a wooden stick.
- In a heavy-bottomed pot, melt sugar until golden, swirl occasionally but do not stir.
- Add butter, whisk until melted, then slowly whisk in cream (stand back as it bubbles).
- For flavor variations: add sea salt, bourbon, or simmer cream with cinnamon stick before mixing in.
- Transfer caramel to a small slow cooker or fondue pot on ‘warm’ setting to keep smooth.
- Arrange toppings in small bowls or jars with spoons for serving.
- Set up station: apples first, then caramel, then toppings, ending with napkins and wax paper for wrapping.
- Encourage guests to dip apples into caramel, roll in toppings, and enjoy immediately.
Notes
Medium-sized tart apples work best for flavor balance and ease of dipping. Keep caramel warm throughout the event to prevent hardening.
- Prep Time: 20 minutes
- Cook Time: 15 minutes
- Category: Dessert
- Method: No Bake
- Cuisine: American
Nutrition
- Serving Size: 1 apple
- Calories: 320
- Sugar: 45g
- Sodium: 120mg
- Fat: 14g
- Saturated Fat: 8g
- Unsaturated Fat: 5g
- Trans Fat: 0g
- Carbohydrates: 50g
- Fiber: 3g
- Protein: 3g
- Cholesterol: 30mg


