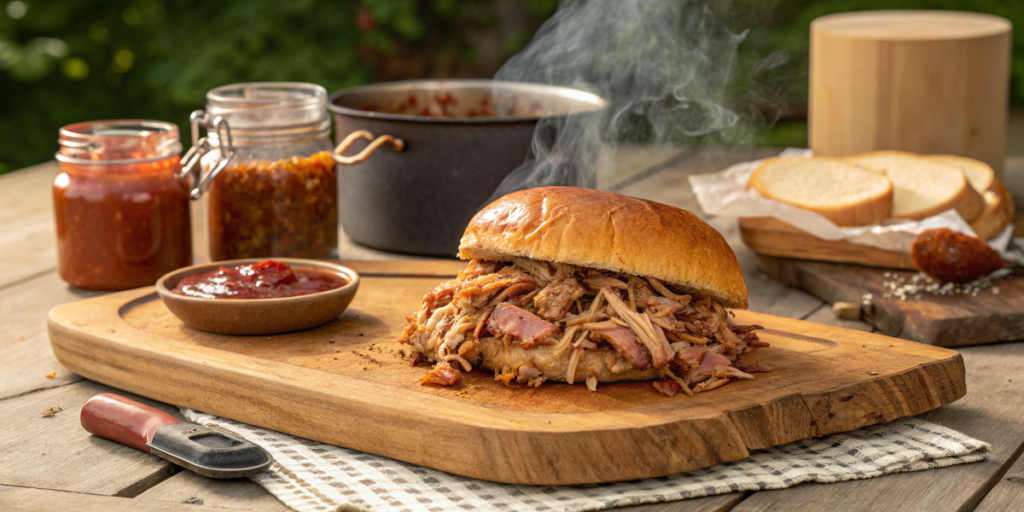
Let’s talk about one of the secrets to mastering pulled pork: internal temperature! Whether you’re a backyard BBQ enthusiast or a seasoned pitmaster, nailing the right temperature makes all the difference. Did you know that pulled pork needs to reach 205°F for perfect tenderness? That’s right—temperature isn’t just a number; it’s your ticket to melt-in-your-mouth goodness. In this guide, I’ll walk you through everything you need to know about getting it just right, from preparation to cooking techniques. Let’s fire up the smoker and dive in!
Table of contents
- Why Internal Temperature Matters for Pulled Pork
- What is the Ideal Internal Temperature for Pulled Pork?
- How to Measure Pulled Pork Internal Temperature Accurately
- Techniques for Achieving Perfect Pulled Pork Temperature
- Troubleshooting Temperature Issues with Pulled Pork
- Pro Tips for Next-Level Pulled Pork
Why Internal Temperature Matters for Pulled Pork
If you’ve ever had pulled pork that’s tough or, worse, dry as a desert, you already know how much internal temperature matters. I learned this the hard way during my first BBQ attempt. Picture this: a beautiful pork shoulder, seasoned to perfection, slowly smoking away. Hours later, I eagerly pulled it off the smoker, only to realize it was more like pulled cardboard than pulled pork. Turns out, I had no clue about the science of temperature.
The Science Behind Tenderness: Collagen Breakdown
Here’s the deal: pork shoulder (or pork butt) is packed with collagen, a tough connective tissue. When you cook it low and slow, something magical happens around 190°F to 205°F—collagen breaks down into gelatin. This is what gives pulled pork that luscious, melt-in-your-mouth texture. If you don’t hit this range, the collagen stays intact, leaving you with meat that feels like chewing on a rubber band. Trust me, it’s not the BBQ experience you want.
I didn’t realize this during that first attempt. I pulled my pork at 180°F, thinking it looked “done.” Sure, it was technically cooked, but it was chewy, tough, and far from shreddable. Now I use a meat thermometer religiously. Lesson learned: it’s all about hitting that sweet spot where the collagen surrenders.
Undercooked Pork = Tough and Chewy
Let’s talk undercooked pork for a second. If you’ve ever tried shredding pork that hasn’t reached at least 195°F, you know the struggle. It won’t pull apart because the fibers haven’t softened enough. Not only that, but the flavor doesn’t develop the same way. You might get a “meh” taste instead of the rich, smoky goodness you’re aiming for.
Here’s a pro tip I’ve learned: don’t rush the process. The infamous “stall” happens when the meat hits around 160°F, and the temperature seems to stop rising. It’s frustrating, but don’t panic! This is just evaporation cooling things down. Wrap the pork in foil or butcher paper to push through it without sacrificing moisture.
Overcooking Can Be a Disaster, Too
Now, before you go cranking up the heat and leaving it on the smoker forever, let’s talk about overcooking. Pork that goes much past 205°F can lose its magic. Instead of juicy strands, you’re left with dry, stringy meat that’s impossible to save—even with a gallon of BBQ sauce. It’s a fine line, but with practice, you’ll know when to stop.
One trick that’s saved me is the poke test. Once the internal temperature hits 205°F, I use a fork to test for tenderness. If it slides in like butter, it’s time to pull it off and let it rest. Oh, and resting? That’s non-negotiable. It gives the juices a chance to redistribute, keeping your pork tender and flavorful.
What is the Ideal Internal Temperature for Pulled Pork?
If there’s one number you need to tattoo into your BBQ brain, it’s 205°F (or 96°C). That’s the golden temperature for perfectly tender, juicy pulled pork that practically shreds itself. It took me a couple of failed attempts—and some tough, disappointing bites—to realize this number isn’t a suggestion; it’s the rule. Let me break down why it’s so important.
The Magic Number: 205°F (or 96°C)
So why is 205°F the sweet spot? It all comes down to how pork transforms as it cooks. At this temperature, the tough connective tissues (collagen) in the pork shoulder fully break down into gelatin. This is what gives pulled pork its silky texture and that mouthwatering, juicy bite. Go lower, and the collagen stays tough; go higher, and you risk drying it out.
I remember one time I got impatient and pulled my pork at 190°F because, hey, it looked done on the outside. Big mistake. When I tried to shred it, the meat was stubbornly clinging together. It wasn’t bad, but it was more “sliced pork” than the juicy pulled pork I had in mind. Lesson learned: 205°F or bust.
Why 190°F Isn’t Enough for Shredding
190°F might sound close to 205°F, but in BBQ terms, it’s like comparing a sprint to a marathon. At 190°F, the pork is technically cooked through, but it’s not shreddable. The collagen hasn’t fully broken down yet, which means the meat will still be tough and stringy. Sure, you could slice it or cube it, but for classic pulled pork, it’s not quite there.
Think of 205°F as the finish line. It’s where all the hard work you’ve put into seasoning, smoking, and cooking pays off. That last stretch of cooking makes all the difference in texture and flavor. Be patient—trust me, the reward is worth the wait.
Resting the Pork After Cooking: Why It’s Critical
Here’s a step a lot of people skip, and I can’t blame them—resting the pork. After hours of cooking, it’s so tempting to dive right in. But resting your pork is just as important as hitting that 205°F mark. When you pull the meat off the heat, the juices are still bubbling inside. If you start shredding right away, all that liquid will spill out, leaving you with dry meat.
I usually wrap the pork in foil and let it rest for at least 30 minutes—sometimes up to an hour if I have the time. This gives the juices a chance to redistribute, making every bite moist and flavorful. Plus, it’s the perfect time to prep sides or sauce while the pork works its magic.
How to Measure Pulled Pork Internal Temperature Accurately
Getting pulled pork just right isn’t just about cooking time—it’s all about hitting that perfect internal temperature. And let me tell you, it’s easier said than done if you’re not using the right tools or technique. When I first started smoking pork, I thought I could eyeball it. Spoiler: I couldn’t. The result? Tough, chewy pork that was more suited for a chew toy than a dinner plate. Trust me, a good thermometer is your BBQ best friend.
Using a Meat Thermometer: Instant-Read vs. Probe Thermometers
When it comes to measuring temperature, not all thermometers are created equal. If you’re still guessing when your pork is done, it’s time to upgrade.
Instant-read thermometers are great for quick checks. You stick it in, get a reading in a few seconds, and you’re good to go. They’re super handy for grilling and quick temp checks, but not ideal for long cooks like pulled pork. Why? Because you’d have to keep opening the smoker to check, and every time you do, you lose heat and slow down the cook.
That’s where probe thermometers shine. These beauties stay in the meat the whole time, and the probe is attached to a digital monitor outside the smoker. It’s like having a temperature babysitter, so you can sip your iced tea (or beer) without constantly hovering over your pork. I switched to a probe thermometer after a few “well, this feels done” disasters, and it was a total game-changer.
The Importance of Placing the Thermometer Correctly
Here’s something I didn’t realize at first: where you place the thermometer probe is just as important as having one. For pulled pork, you want to stick the probe into the thickest part of the meat. Avoid the bone if you’re cooking a bone-in shoulder, as it can give a false reading.
I made the mistake once of placing the thermometer too close to the surface of the pork. It read 205°F, so I pulled it off the smoker, feeling like a BBQ champ. But when I shredded it, the center was still tough. Turns out, the surface heated up faster than the inside. Now I make sure to aim for the center every time.
Signs Your Thermometer Might Be Giving False Readings
Okay, let’s talk about the sneaky villain in BBQ: a faulty thermometer. It’s not uncommon, especially if you’re using an older model or a cheap one from the discount aisle.
One sign of trouble? If the temperature jumps around wildly when you insert the probe. Another red flag is if your pork seems “done” way earlier than expected. For pulled pork, you’re usually looking at 1.5-2 hours of cooking per pound at low heat. If your thermometer says you’re at 205°F in half the time, it’s probably lying.
To be safe, I always calibrate my thermometer before a big cook. Just stick it in boiling water (212°F at sea level) and make sure it reads correctly. If it’s off, adjust it or get a new one. It’s a small step that can save a whole day’s worth of cooking.
Techniques for Achieving Perfect Pulled Pork Temperature
Pulled pork isn’t just a dish; it’s an art form. And like any art, it takes the right techniques to master it. Hitting that perfect internal temperature of 205°F is only half the battle—the way you get there makes all the difference. Over the years, I’ve tested (and sometimes failed) with different methods, and now I’m here to share the secrets to pulling off perfect pulled pork every time.
Low and Slow: The Best Temperature Settings for Smoking
The phrase “low and slow” might sound cliché, but it’s gospel in the BBQ world. To achieve juicy, tender pork, you need to cook it at a low temperature—typically between 225°F and 250°F. This slow cook allows the fat and collagen to break down gradually, giving you that melt-in-your-mouth texture.
I’ll admit, when I first started, I was impatient. I cranked the smoker to 300°F to “speed things up.” The result? Pork that was tough on the inside and dry on the outside. Now I embrace the slow pace. I like to keep my smoker steady at 250°F, which feels like the sweet spot—hot enough to get the job done but still low enough to avoid drying out the meat.
Oven vs. Smoker: Does the Method Matter?
Ah, the age-old debate: smoker or oven? The truth is, both can produce amazing pulled pork, but they’re not created equal.
A smoker wins hands-down if you want that authentic BBQ flavor. The wood smoke infuses the meat with rich, smoky goodness that you just can’t replicate in an oven. I usually go for hickory or applewood—hickory for a bolder taste, and applewood for a subtle sweetness.
But let’s be real: not everyone has a smoker, and sometimes the weather isn’t BBQ-friendly. That’s where the oven comes in. It might lack the smoky flavor, but it can still deliver tender, juicy pork. Just keep the oven at the same 225°F to 250°F range, and consider adding a liquid (like apple juice or broth) to the pan for moisture. For a smoky touch, you can cheat a little by adding liquid smoke to your rub or braising liquid.
Wrapping Your Pork: When and Why to Use Foil or Butcher Paper
Let’s talk about wrapping, also known as the “Texas crutch.” Wrapping your pork in foil or butcher paper during the cook can be a lifesaver, especially when you hit the infamous temperature “stall.” This happens when the internal temp plateaus around 160°F as moisture evaporates from the meat. If you don’t wrap, you could be stuck in the stall for hours.
Foil is the go-to for locking in moisture and speeding up the cook. It’s practically foolproof, but some argue it can soften the bark (that crispy, flavorful crust on the pork). If you’re a bark lover like me, consider butcher paper instead. It lets the meat breathe a little while still retaining enough moisture to push through the stall. Plus, it gives you that nice, firm bark we all crave.
When do I wrap? Usually when the pork hits 160°F, right at the start of the stall. This cuts down on cook time while ensuring the pork stays juicy. Pro tip: if you’re using foil, add a splash of apple juice, cider vinegar, or even beer before sealing it up. It gives the meat an extra boost of flavor.
Troubleshooting Temperature Issues with Pulled Pork
Cooking pulled pork is part science, part patience. And let’s face it, no matter how prepared you think you are, sometimes things just go sideways. From the dreaded temperature stall to dry or chewy meat, there’s plenty that can go wrong. But don’t worry—most of these issues are fixable if you know what to do. Here’s how to handle the most common temperature problems with pulled pork.
What to Do If the Pork Stalls at 160°F (The Infamous “Stall”)
Ah, the dreaded stall. If you’ve been smoking meat long enough, you’ve probably experienced it: the internal temperature of your pork hits 160°F and just stays there for what feels like forever. It’s frustrating, but totally normal. The stall happens because moisture from the pork evaporates, cooling the surface and slowing the cooking process.
When I first encountered the stall, I panicked. I thought my thermometer was broken or my smoker wasn’t hot enough. Spoiler: neither was true. The best way to beat the stall is to wrap your pork in foil or butcher paper. This traps heat and moisture, helping the temperature climb again.
If you’re a purist who loves a super-crispy bark, you can let the pork ride through the stall unwrapped. Just know it’ll take longer—so grab a snack and practice patience.
Why Your Pork Isn’t Tender Even at 205°F
Okay, so you hit the magic number—205°F—but your pork is still tough. What gives? Usually, this happens when the pork hasn’t cooked long enough. While 205°F is the target internal temperature for shredding, the connective tissue still needs time to break down completely. If you rush it, you’ll end up with meat that’s technically done but still too firm.
The fix? Let the pork cook a little longer. I’ve had some cuts of pork that needed an extra 20 to 30 minutes beyond 205°F to get perfectly tender. Another possibility is that you didn’t let it rest after cooking. Resting allows the juices to redistribute, making the pork easier to shred and more flavorful. Wrap it in foil and let it sit for at least 30 minutes before pulling.
Fixing Common Mistakes: Dry Pork or Uneven Cooking
Dry pulled pork is the ultimate letdown. You spend hours tending to it, only to find that it’s drier than a Monday morning meeting. This usually happens if the pork was cooked too fast, too hot, or wasn’t wrapped during the cook.
To salvage dry pork, try adding a bit of moisture back in. Mix up a sauce with BBQ sauce and apple cider vinegar, then toss it with the shredded pork to rehydrate it. If you’re storing leftovers, pack them with some of the juices or broth to keep them moist when reheated.
Uneven cooking is another common issue, especially if the pork shoulder is oddly shaped or you’re cooking on a smaller grill or smoker. Make sure to position the pork so it cooks evenly—placing it fat side up can help baste the meat as it cooks. Also, check your smoker or oven temperature for hotspots and adjust accordingly.
Pro Tips for Next-Level Pulled Pork
So, you’ve got the basics of pulled pork down—hitting the right temperature, wrapping it like a pro, and waiting out the stall. But what about taking it to the next level? This is where flavor, technique, and a few insider tricks come into play. Whether it’s adding bold flavor, resting your pork just right, or mastering the art of shredding, these tips will help you turn good pulled pork into unforgettable pulled pork.
Adding Flavor While Monitoring Temperature: Rubs, Brines, and Injections
Flavor is everything when it comes to pulled pork. Sure, the smoke adds a lot, but don’t miss the chance to pack in extra layers of deliciousness before the meat even hits the smoker. A good rub, brine, or injection can take your pork from basic to competition-worthy.
I like to start with a dry rub—a mix of salt, sugar, paprika, garlic powder, and a touch of cayenne for heat. Apply it generously, rubbing it into every nook and cranny of the pork shoulder. This creates that flavorful bark we all love. Pro tip: let the rub sit on the meat for a few hours (or even overnight) in the fridge to really let those flavors sink in.
If you want even more flavor, try a brine. A simple mix of water, salt, and sugar works wonders for keeping the meat juicy. You can also add aromatics like bay leaves, peppercorns, or even apple cider. Let the pork soak for 8-12 hours for the best results.
And then there’s the injection method, my personal favorite for special occasions. Using a meat injector, I’ll pump a flavorful liquid—like a mix of apple juice, melted butter, and spices—directly into the pork. It keeps the inside moist while adding bursts of flavor in every bite.
The trick is to balance all these steps with monitoring the temperature. Too much opening and closing of the smoker can mess with the heat, so plan your flavoring steps in advance and stay efficient.
Letting the Pork Rest: How Long is Enough?
Resting your pork might feel like an unnecessary delay when you’re hungry, but trust me, it’s crucial. Once your pork hits the perfect internal temperature of 205°F, the juices are still moving around inside. If you start shredding right away, all those flavorful juices will spill out, leaving you with dry meat.
I like to wrap my pork tightly in foil, then place it in a cooler lined with towels to keep it warm. Let it rest for at least 30 minutes, but if you can wait an hour, even better. During this time, the juices redistribute throughout the meat, making it tender and flavorful. Plus, it gives you time to get your sides and sauces ready!
Shredding Techniques to Maximize Juiciness and Flavor
Shredding pulled pork might seem straightforward, but there’s more to it than just pulling it apart. The goal is to create tender strands of pork that are evenly coated in their own juices (and maybe a little extra sauce).
Start by removing the bone if you’re working with a bone-in shoulder. If the pork is cooked properly, the bone should slide right out. Next, grab a pair of meat claws (they’re a game-changer) or simply use two forks. Pull the meat apart into small, manageable strands.
Here’s the pro move: while shredding, toss the pork in the juices that collected during the cook. If you wrapped your pork, those juices are gold—don’t toss them! You can also mix in a bit of BBQ sauce, cider vinegar, or even a touch of melted butter for extra flavor and moisture.
If you’re feeding a crowd, keep the shredded pork warm in a slow cooker on low heat. Add a splash of apple juice or broth to prevent it from drying out.
Mastering the internal temperature of pulled pork is the key to unlocking BBQ perfection. By aiming for that magical 205°F and using the right tools and techniques, you can consistently create tender, juicy pulled pork that will have everyone asking for seconds. So grab your thermometer, prep your smoker, and let’s get cooking! Got a favorite pulled pork tip or recipe? Share it in the comments below—I’d love to hear from you!


